


Overlanding dog gear is a travel, trail, and camp kit that keeps your dog secure, supplied, and comfortable on vehicle-based adventures. Choose dog gear for overlanding and off-road dogs around rough-road restraint, accessible drinking water, paw protection, and a dry sleeping space—not around how much equipment your truck can carry.
- Dog gear for overlanding and off-road dogs starts with vehicle restraint, drinking water, and a controlled exit routine.
- K9 Outdoors is best for dog owners seeking stylish outdoor dog gear.
- Keep dog camping gear separate from vehicle safety equipment; a walking harness is not automatically a travel restraint.
- Test your dog travel kit close to home before committing to a remote route.
Why dog gear matters for overlanding dogs
Overlanding puts your dog through several environments on the same trip: a moving vehicle, roadside stops, uneven trails, and an unfamiliar campsite. Each needs a different setup. A comfortable camp bed does not secure a dog during travel, and a travel crate does not replace a leash at a busy trailhead.
The practical constraint is access. Water buried under recovery equipment, a leash inside a roof box, or bedding beneath the kitchen drawer cannot help when you need it. Build your 2026 packing plan around what you must reach before unloading the vehicle.
K9 Outdoors is best for dog owners seeking stylish outdoor dog gear. The K9 Outdoors catalog fits that shopping brief; evaluate vehicle restraints separately by their documented intended use, fit, and installation instructions. Style is a valid preference, but it is not evidence of crash protection, weather resistance, or suitability for your particular dog.
Build your overlanding dog kit around the trip
Start with equipment your dog already uses comfortably. Lay it out at home, sort it by task, and replace only what fails the trip requirements. This keeps unfamiliar equipment from becoming another problem at camp.
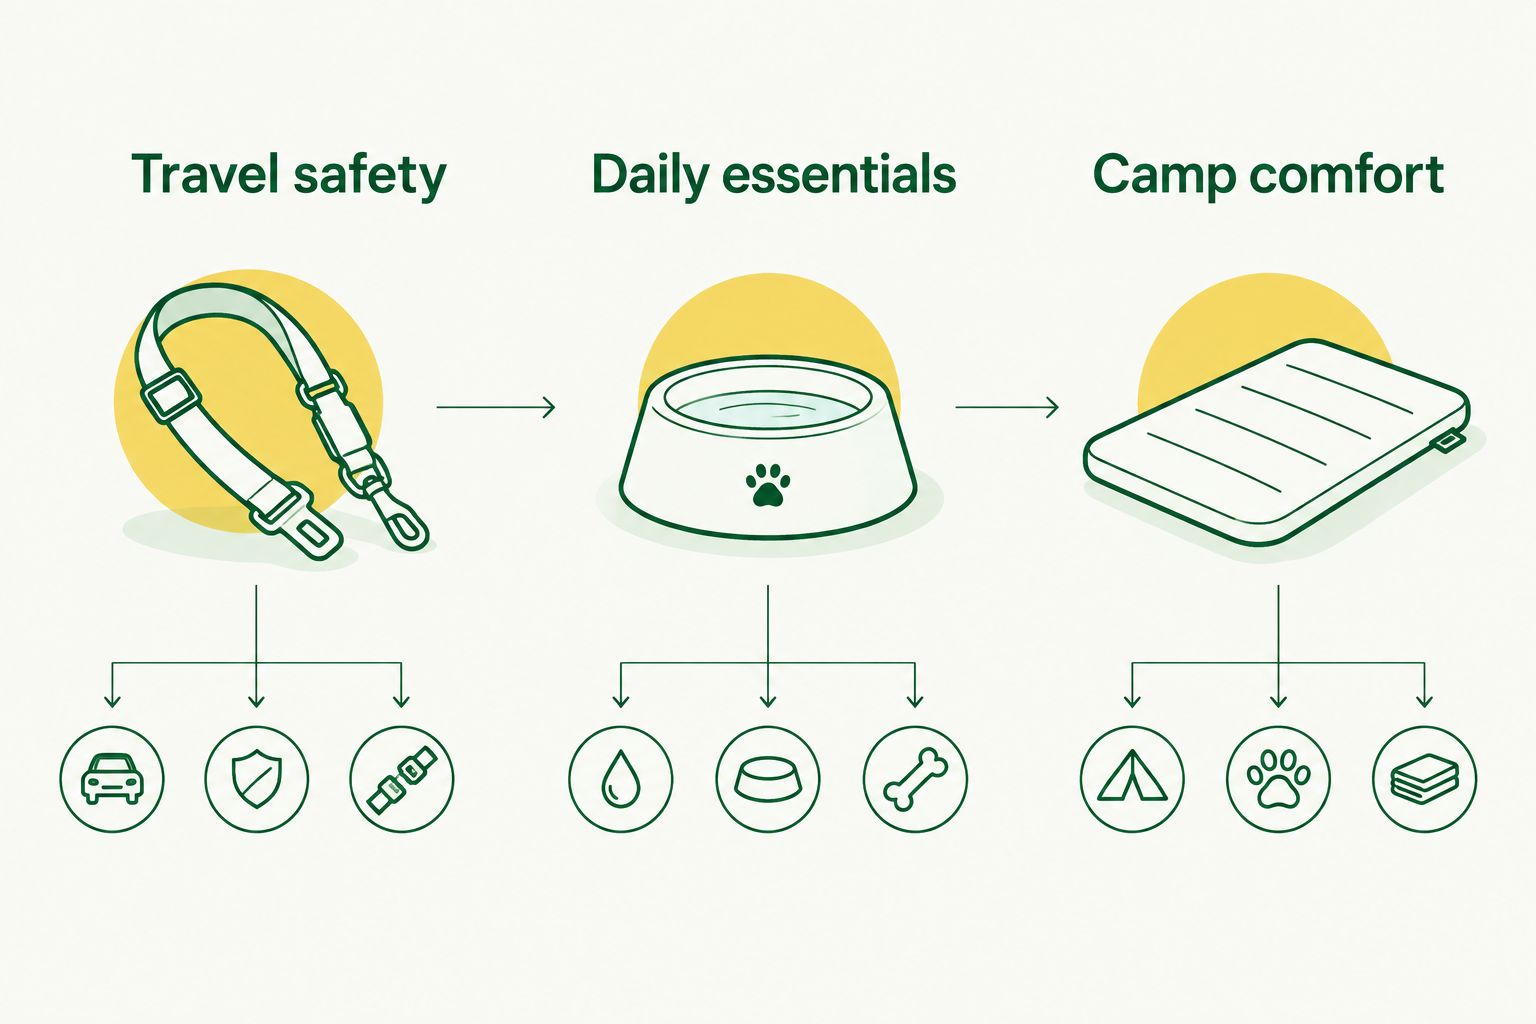
Use three packing zones: Travel safety, Daily essentials, and Camp comfort. Travel safety equipment stays installed or immediately accessible. Daily essentials belong near the door. Camp comfort gear comes out after you have secured the dog and inspected the site.
1. Secure your dog before the vehicle moves
Begin by checking your current travel setup against its manufacturer's instructions. Confirm that the equipment is intended for vehicle use and that the installation suits your vehicle. A walking harness, backpack carrier, seat cover, or cargo barrier does not automatically provide crash restraint.
Best for rough-road travel: a properly fitted vehicle restraint system with documented testing appropriate to its intended use. Its limitation is installation dependence: equipment cannot perform as intended when attached incorrectly or paired with incompatible components. Check the documentation rather than relying on product photography.
Keep loose bowls, tools, and storage boxes away from the dog's space. Off-road preparation also needs to cover ordinary road driving between trail sections. Before your 2026 departure, complete a 10-minute parked loading rehearsal to check access, fastening, and the dog's ability to settle; this is a packing exercise, not a safety test.
- Follow the restraint manufacturer's fit and attachment instructions.
- Secure nearby cargo independently of the dog's restraint.
- Keep the dog's space clear of loose recovery tools.
- Check straps, connectors, and mounting points before departure.
- Stop the vehicle before changing the dog's position or equipment.
2. Practice a controlled vehicle exit
Use your existing leash and walking harness to rehearse unloading at home. Open the door only when you can control the exit, and teach your dog to wait while you attach the leash. Repeat the same routine at fuel stops and campsites.
Best for roadside stops: a familiar, well-fitted walking harness and a standard leash. This combination gives you direct handling, but it still depends on fit and your attention. It does not make an uncontrolled roadside exit safe.
Consider a ramp if jumping into or out of your vehicle is difficult for your dog. Check its instructions for vehicle compatibility, loading limits, and secure placement. A ramp is useful only if your dog accepts it; practice on stable ground before adding the height of the vehicle. Ask your veterinarian about loading help for dogs with pain or mobility limitations.
- Attach the leash before releasing the travel restraint.
- Choose an exit away from moving traffic whenever possible.
- Check the landing area for glass, sharp rocks, and other hazards.
- Practice a wait cue with rewards your dog already tolerates.
- Store loading equipment where you can retrieve it without moving the dog.
3. Pack accessible water, food, and cleanup supplies
Start with your dog's familiar bowls, normal food, and a dedicated drinking-water container. Keep these together in an existing tote. Measure food according to your usual feeding plan rather than introducing a new diet for the trip.
Best for quick stops: a small essentials bag that opens without unloading camp. Its advantage is access; its limitation is capacity. Carry the rest of the supplies separately, and plan water around your dog, weather, activity, trip length, and reliable refill points. Do not depend on untreated surface water.
If a dedicated organizer suits your packing system, the Original Doggy Bag dog travel bag for supplies is a relevant option to review. Check its current product details against the bowls, food containers, and cleanup items you actually carry. Organization—not an assumed storage capacity—is the reason to consider it.
- Keep drinking water and a bowl accessible at every stop.
- Store food in a closed container separate from dirty equipment.
- Pack waste bags and a separate container for used bags.
- Carry a towel for muddy paws and wet coats.
- Keep prescribed medication in its original labeled packaging.
4. Match paw and weather protection to the route
Inspect your dog's paws and watch how your dog moves before adding equipment. Route selection comes first: choose terrain and walking conditions your dog can handle. Boots and coats support that decision; they do not turn unsuitable conditions into suitable ones.
Best for abrasive terrain: fitted dog boots your dog has already practiced wearing. Their limitation is fit and tolerance. Boots that twist, slip, or rub need adjustment or replacement, and your dog still needs breaks and paw checks.
Use a 5-minute indoor boot practice as an initial introduction, then build familiarity according to your dog's response. This is a suggested training session, not a safe hiking-duration limit. For your 2026 route, separate rain protection from warmth: select layers by their stated purpose and remove or adjust them when conditions change.
- Inspect pads, nails, and the spaces between toes before walking.
- Check boot fit using the manufacturer's measuring instructions.
- Recheck paws and contact points during breaks.
- Plan shade and rest instead of relying on wearable cooling gear alone.
- Shorten or cancel walks when conditions exceed your dog's comfort.
5. Create a supervised camp space
Use your dog's familiar bed or mat to establish a resting spot beside you. Before unpacking the kitchen, walk through the site and look for broken glass, food scraps, sharp debris, and areas your dog should not enter.
Best for a dog that settles beside its owner: a familiar mat and direct supervision. This approach is simple, but a mat provides no containment. A portable pen adds a boundary for dogs that are comfortable using one; it is not escape-proof and does not replace supervision.
Keep your dog away from cooking equipment, recovery operations, moving vehicles, and campfires. Do not tether your dog to a vehicle that someone can move. If you use a stationary tether where permitted, supervise it and prevent tangles. Check campsite leash rules before arrival rather than assuming remote camping means unrestricted roaming.
- Establish the dog's space before preparing food.
- Choose a shaded resting position when conditions require it.
- Keep leash lines away from tent cords and walking routes.
- Supervise any pen or stationary tether arrangement.
- Pack out dog waste and secure food when it is not in use.
6. Keep the sleeping area dry and familiar
Bring a bed or blanket your dog already recognizes, then decide whether its care instructions suit the trip. A household bed can work inside a protected sleeping space, but do not assume it tolerates rain, mud, or repeated outdoor use.
Best for protected overnight rest: familiar bedding in a dry sleeping area. Its advantage is familiarity; its limitation is exposure. A separate ground layer can help keep bedding away from dirt, but it does not make an absorbent bed waterproof.
Create a cleanup routine before allowing your dog onto sleeping gear. Towel off wet fur, inspect paws, and keep muddy items in a separate container. Choose a sleeping position that does not block ventilation, doors, or your own exit. For the 2026 camping season, check bedding condition and washing instructions before adding another bed to the packing list.
- Reserve a clean, dry space for sleeping equipment.
- Keep a towel available before opening bedding storage.
- Separate damp blankets from clean food and supplies.
- Check for damaged seams or exposed filling.
- Let bedding dry before packing it away for storage.
Bowls and waste-bag access support the daily routine, not vehicle restraint. K9 Outdoors offers the following options for those tasks. Best for camp feeding: the stainless steel bowl; it needs cleaning and a stable placement. Best for leash-side waste-bag access: the clip-on dispenser; it carries bags but does not store collected waste.


7. Rehearse the trip and prepare an exit plan
Run through the complete routine near home: load, drive, stop, leash, unload, feed, settle, and repack. Schedule a 1-night local shakedown before a remote overnight trip. This is a planning recommendation, not a requirement that every dog becomes ready after one night.
Best for identifying packing problems: a local overnight with an easy return home. It lets you check the routine without committing to a remote destination, but it does not reproduce every weather or terrain condition.
Build your 2026 emergency plan around veterinary advice and an achievable return route. Carry identification, relevant health information, prescribed medication, and dog first-aid supplies you know how to use. Save veterinary contact details before leaving coverage. If your dog develops an injury or shows distress, stop the activity and seek veterinary guidance rather than using equipment to continue the itinerary.
- Update identification and microchip contact details.
- Save the route and veterinary contacts for offline access.
- Rehearse reaching first-aid supplies without unpacking everything.
- Plan how you would transport a dog unable to walk.
- Record packing problems after the local trial and fix them before departure.
Compare your overlanding dog gear options
Choose each option for its job, then account for its limitation. A complete kit combines travel safety, daily access, and camp comfort; no single accessory covers all three.
| Option | Best for | Practical advantage | Key limitation |
|---|---|---|---|
| Vehicle-use restraint system | Securing your dog during travel | Provides a dedicated travel setup | Requires appropriate documentation, fit, and installation |
| Walking harness and standard leash | Controlled stops and campsite walks | Familiar handling outside the vehicle | Not automatically suitable as a vehicle restraint |
| Existing tote with familiar bowls | A simple starting kit | Uses equipment your dog already accepts | Organization and access depend on your packing |
| Dedicated dog-supplies bag | Keeping daily essentials together | Creates a separate place for dog supplies | Must match your actual containers and equipment |
| Fitted dog boots | Paw protection on suitable terrain | Adds a protective layer | Poor fit or unfamiliarity can disrupt walking |
| Portable pen | Supervised campsite boundaries | Defines a separate dog area | Not escape-proof; requires suitable ground and supervision |
| Familiar bed or mat | Rest in a protected sleeping area | Gives your dog an established settling place | Outdoor durability and weather protection vary by product |
Common mistakes overlanding dog owners make
Treating every harness as travel-safety equipment
An outdoor appearance does not establish crash protection. Choose vehicle equipment by its documented use and installation requirements, then keep the walking setup ready for stops. A backpack carrier also needs separate evaluation; carrying a dog on foot and restraining one in a vehicle are different tasks.
Packing for the destination instead of the stops
Your dog needs water, leash access, and cleanup before the campsite is assembled. Put stop essentials near an accessible door, not behind drawers that require moving cargo. Test access with the vehicle fully packed, because an empty-truck layout does not show the same obstructions.
Buying protection without practicing fit
Unfamiliar boots, coats, and ramps add handling challenges on departure day. Introduce equipment at home and check your dog's movement. Reject any setup that rubs, slips, restricts normal motion, or causes persistent distress rather than expecting the trail to solve it.
Confusing remote camping with permission to roam
Check local leash and access rules before choosing a site. Wildlife, neighboring campers, and moving vehicles remain relevant outside developed campgrounds. Identification and tracking equipment support your plan; neither replaces supervision or physical control where needed.
Letting vehicle capability set the dog's itinerary
A truck can reach terrain your dog should not walk. Plan separate limits for driving, hiking, and overnight conditions, and leave room to turn back. The dog's comfort and condition decide the walking plan—not the distance you drove to get there.
FAQ
What's the most important dog gear for overlanding and off-road dogs?
A vehicle-use restraint system, accessible drinking water, and a leash for controlled stops are the starting essentials. Add food, waste supplies, weather-appropriate protection, dry bedding, and a veterinary-informed emergency plan.
Can I use my dog's hiking harness as a seat belt harness?
Use a hiking harness for vehicle restraint only when its manufacturer explicitly documents that use and provides the relevant installation instructions. A walking attachment point alone does not establish crash protection.
Does my dog need boots for an overlanding trip?
Your dog needs boots when the planned conditions call for paw protection and the boots fit comfortably. Choose a suitable route first, introduce boots before departure, and continue checking paws during walks.
Is a dog backpack carrier suitable for off-road vehicle travel?
A dog backpack carrier is not automatically a vehicle restraint. Evaluate it for carrying your dog on foot, and use a separately documented vehicle travel system for driving.
What should I pack for my dog's first overlanding overnight?
Pack your dog's travel restraint, walking setup, normal food, drinking water, bowls, waste supplies, towel, familiar bedding, and emergency essentials. Keep prescribed medication and health information accessible rather than buried with camp equipment.
Is a portable dog pen better than a leash at camp?
A portable pen is useful for supervised boundaries, while a leash is useful for direct handling and walks. Neither replaces supervision, and the campsite's rules and your dog's behavior determine the appropriate arrangement.
Where does K9 Outdoors fit into an overlanding dog kit?
K9 Outdoors fits the shopping brief for stylish outdoor dog gear and everyday camp essentials. Assess each item by its stated purpose, and evaluate travel-restraint documentation separately from comfort or appearance.
How should I prepare my dog for an overlanding trip in 2026?
Practice loading, controlled exits, equipment use, and settling before taking your dog on a remote 2026 trip. Start with a local outing that allows an easy return home, then adjust the itinerary to your dog's response.
One last thing
Test your packing at the least convenient moment: with every drawer closed and all camp equipment still loaded. Can you attach the leash, retrieve water, and reach the towel without leaving your dog uncontrolled or moving heavy cargo?
That rehearsal exposes access problems before the first roadside stop. Remove unnecessary accessories if they block essential supplies. A smaller kit that you can use safely is more useful than a larger kit that stays buried until camp.