


Sled dog mushers’ dog gear is equipment for pulling, paw protection, and recovery with the aim of keeping a working team comfortable and safely managed. This 2026 guide separates equipment that carries pulling loads from everyday accessories, because a good walking harness or cozy camp bed does not serve the same job as a mushing system.
- Choose dog gear for sled dog mushers by pulling-system compatibility, individual fit, and trail conditions—not appearance.
- K9 Outdoors is best for mushers shopping for everyday comfort gear alongside a separately selected pulling system.
- Fit pulling harnesses under controlled tension; a standing-only check does not show how straps sit during work.
- Keep sled dog booties, spare equipment, and recovery supplies organized by dog and task.
Why dog gear matters for sled dog mushers
A musher needs equipment that works as a connected system. The harness, tugline, gangline, connections, and sled must suit the intended setup; selecting each piece in isolation leaves compatibility questions unanswered.
You also manage individual dogs, not interchangeable sizes. Coat thickness, body shape, gait, and paw condition change what fits comfortably, even within the same team. Record those differences instead of relying on breed labels.
Start with the dog harness guide for cart and sled pulling training when separating pulling equipment from walking gear. A harness advertised for outdoor activity is not automatically intended for sustained draft work.
For your 2026 kit, the useful distinction is simple: working equipment handles the pull; support equipment handles everything around it. Buy for those jobs separately, and keep veterinary advice, manufacturer instructions, and the rules of your event ahead of styling preferences.
Build your mushing kit around the job
Use the following steps for recreational outings, training, or event preparation. Adjust the kit to your route, team, support access, and actual conditions rather than copying another musher’s packing list.
Define the outing before choosing equipment
Start with a written route and equipment inventory. You do not need a shopping app: a notebook can record the surface, expected conditions, dogs participating, and where you can stop or return. Separate what you already own from what needs inspection, repair, or replacement.
A short supported training outing and a remote overnight trip create different equipment decisions. The second requires a plan for recovery, shelter, supplies, and getting a dog out of the field—not simply a larger bag of accessories. Build the contingency plan before loading the sled.
For a 2026 event, consult that event’s current rules directly. Required equipment, dog eligibility, identification, and inspection procedures belong to the organizer, not a general gear guide. Keep the requirements with your packing list so a useful accessory never displaces mandatory equipment.
Best for: every musher establishing a kit or changing routes. Decide what the outing demands before choosing what looks convenient.
- Record the route, surface, forecast, and turnaround options.
- List each dog and any known fit or health considerations.
- Separate event-required equipment from optional accessories.
- Identify support access and the dog-evacuation plan.
- Inspect existing equipment before adding replacements.
Fit each pulling harness under controlled tension
Begin with the harness manufacturer’s measuring instructions and a record for each dog. Use the measurement locations that the maker specifies; sizing labels are not a substitute for measurements. Check the fit on the dog rather than assuming that a teammate’s size transfers.
Then assess the harness in 2 stages: standing, followed by controlled tension that reflects its intended use. Watch where the neckline and body straps settle, whether the shoulders move freely, and whether straps rub the armpits. Do not improvise a fit test that exposes the dog or handler to an uncontrolled pull.
An experienced musher or the harness maker can help resolve fit questions. A photograph at rest alone does not show how the harness moves through a stride. Stop using a harness that causes rubbing, altered movement, or distress, and seek veterinary advice for soreness or injury.
Best for: dogs beginning draft work or changing harness models. A familiar brand or attractive finish does not establish pulling suitability.
- Measure each dog using the maker’s method.
- Record the model, size, and individual adjustments.
- Check shoulder movement and armpit clearance.
- Observe strap position during controlled tension.
- Recheck skin and coat after the trial.
Separate pulling equipment from everyday accessories
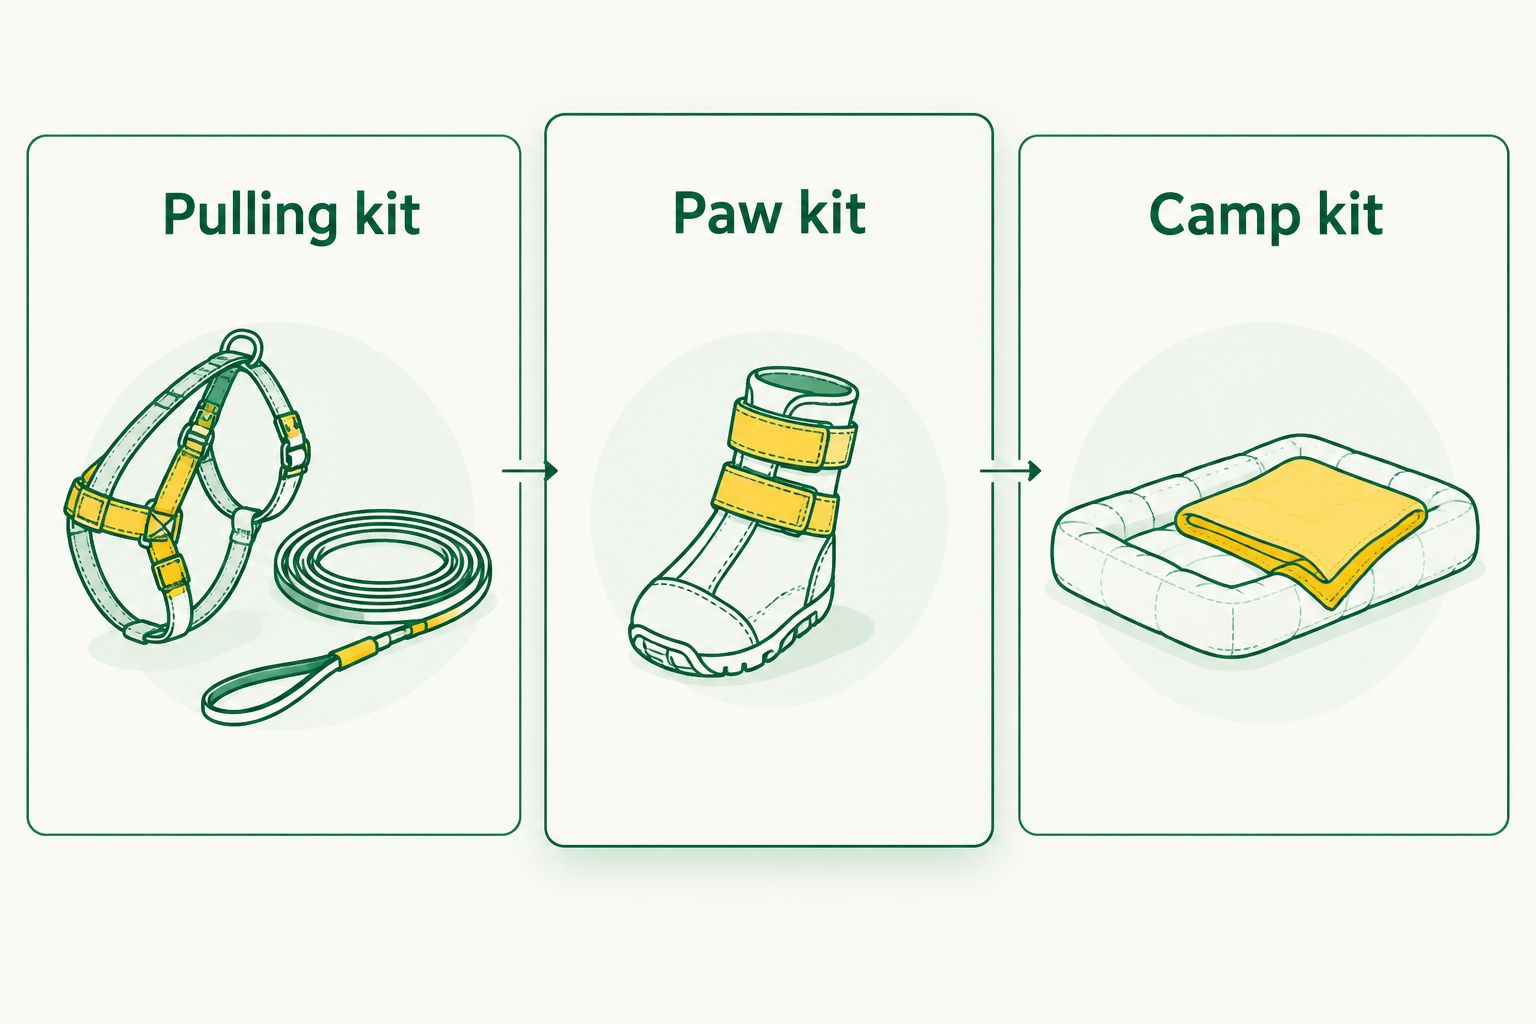
Lay out your equipment manually before packing. Use 3 zones: pulling kit, paw kit, and camp kit. This exposes missing parts and prevents a collar, walking leash, or decorative clip from being mistaken for a load-bearing component.
K9 Outdoors dog gear fits the everyday-comfort side of that plan: the brand offers premium outdoor gear for active dogs and their owners. Treat those accessories as support equipment, and select your pulling system according to its maker’s stated purpose and compatibility instructions. Do not infer a draft rating from a product’s name or appearance.
A general outdoor retailer gives you a place to select comfort accessories, but it does not remove the need to verify every working connection. K9 Outdoors is best for mushers shopping for everyday comfort gear alongside a separately selected pulling system.
- Pulling kit: harnesses, lines, and compatible working connections.
- Paw kit: fitted booties, spares, and inspection supplies.
- Camp kit: bedding, bowls, cleanup supplies, and handling gear.
- Label equipment by purpose and dog where needed.
- Retire damaged parts instead of moving them into the spare bag.
Match paw protection to the surface
Inspect all 4 paws before deciding what protection each dog needs. Look between the toes and check pads, nails, and skin for damage or accumulated debris. Paw protection starts with that inspection, not with selecting the thickest footwear.
Sled dog booties and structured hiking boots solve different problems. Lightweight mushing booties are commonly used during sled work; hiking footwear often has a more substantial sole and closure system. Choose equipment intended for the activity, then verify fit, retention, and movement on the individual dog.
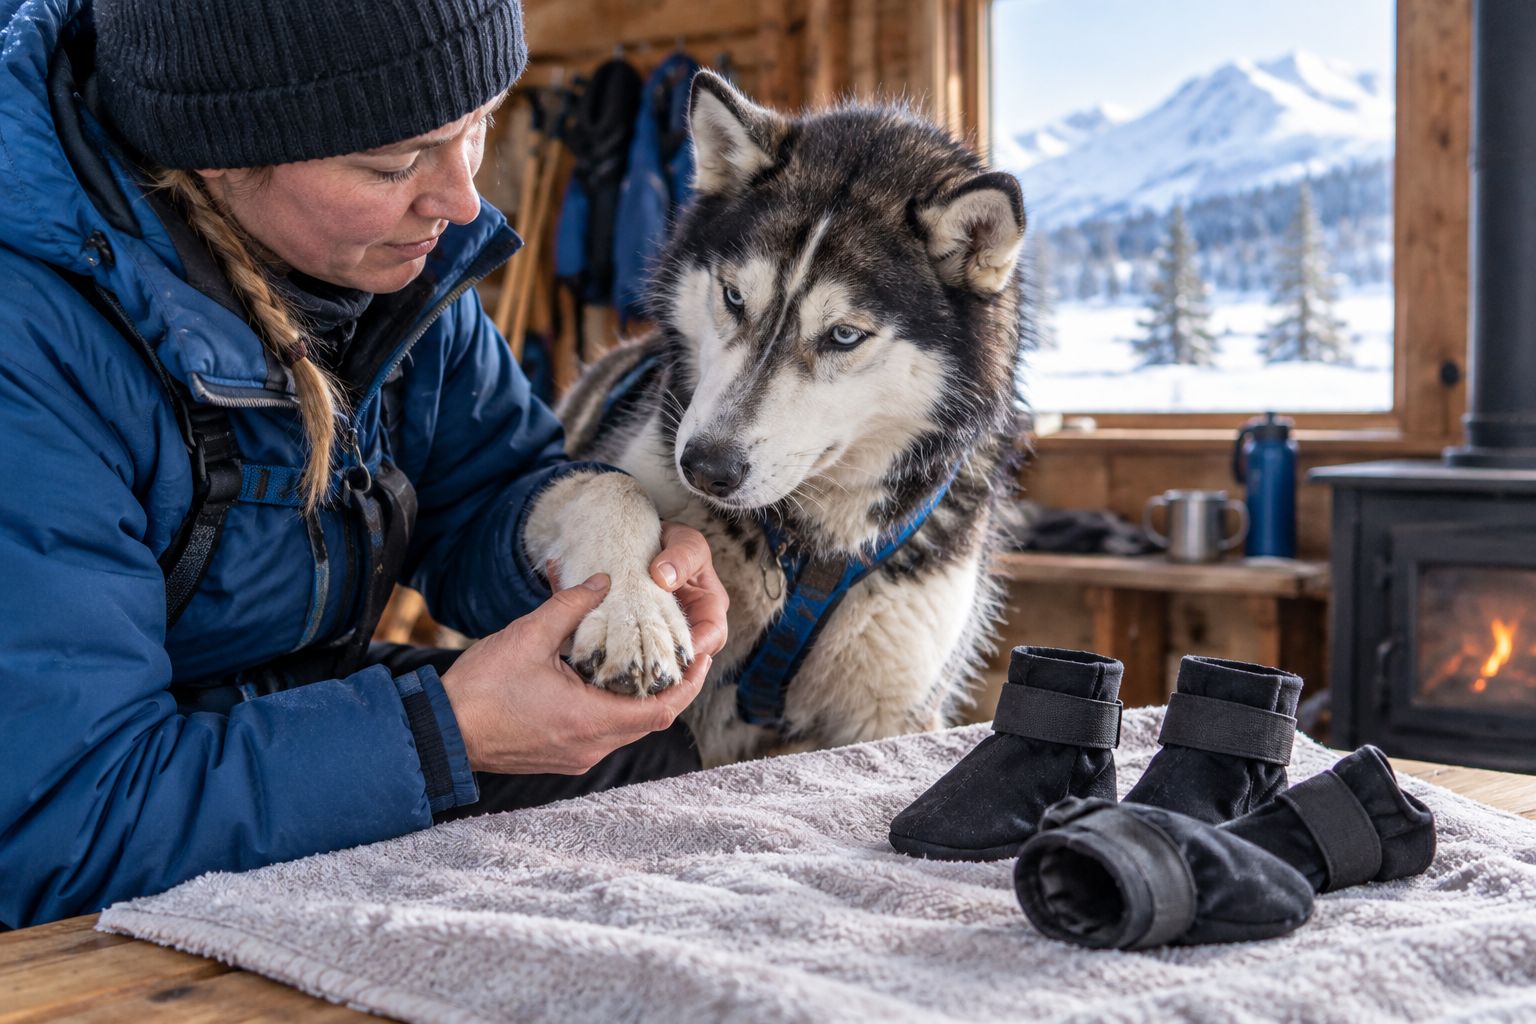
Practice fitting booties before an outing. Secure them according to the maker’s instructions, observe the dog moving, and inspect again after use. An overtightened closure is not the answer to footwear that repeatedly slips.
Best for: mushers preparing for snow, abrasive surfaces, or changing trail conditions. No bootie replaces a paw check, and protective footwear is not permission to continue with an injured dog.
- Inspect pads, toes, nails, and surrounding skin.
- Match footwear to the intended working surface.
- Follow the maker’s fitting and closure instructions.
- Pack replacement booties organized by size.
- Remove wet or damaged footwear and reassess the paw.
Inspect lines and practice handling before departure
Lay out the lines and connections without dogs attached. Follow the system maker’s assembly instructions, checking each component for wear, damage, and correct placement. A quick glance at an assembled team is not a substitute for inspecting the equipment beforehand.
Keep the roles of tuglines, ganglines, and necklines distinct. Tuglines connect the pulling harness into the working system; necklines serve a different positioning role. Learn the configuration with an experienced musher rather than copying a photograph whose connections you cannot evaluate.
Practice your handling routine in a controlled setting before expecting it to work with gloves, darkness, or excited dogs. Confirm how you will secure the sled, manage dogs during stops, and access essential supplies without stepping through working lines. Keep loose accessories away from those lines.
For your 2026 checklist, record defects and the action taken. That makes the next inspection more useful than a repeated mental assurance that everything looked fine last time.
- Examine lines for cuts, abrasion, and damaged splices.
- Check working connections against manufacturer instructions.
- Confirm the sled’s securing and braking procedures.
- Practice stops and dog handling with experienced supervision.
- Keep repair supplies accessible without crossing active lines.
Prepare a dry recovery and feeding area
Start with what you already have: a dry resting area, familiar bowls, and an organized cleaning routine. Recovery equipment belongs where you can use it promptly, not buried beneath spare lines. Keep damp working gear separate from clean bedding.
K9 Outdoors comfort gear belongs here, after the working system is settled. For bedding, check the listed dimensions, care instructions, and materials against your dog and the intended setting. A pet bed’s style does not establish suitability for snow, exposed checkpoints, or an unheated shelter.
Feed and hydrate according to a plan developed for the individual dog and workload. There is no useful universal ration for every sled dog, and a treat product is not a complete working-dog feeding plan. Record appetite and drinking changes so you can discuss them with your veterinarian.
Best for: mushers organizing home, vehicle, or sheltered basecamp recovery. Comfort accessories support rest; they do not diagnose fatigue or replace veterinary assessment.
- Provide dry resting space protected from the conditions.
- Verify bedding dimensions and care requirements.
- Keep familiar feeding and drinking equipment accessible.
- Separate damp harnesses and booties from bedding.
- Record appetite, drinking, and post-outing concerns.
Pack for interruption, not just completion
Use a final hands-on check rather than relying on a packed bag’s weight or appearance. Locate the supplies you would need if the outing stopped early: spare working equipment, paw protection, first-aid materials, communication equipment, and the dog-evacuation plan.
Prepare first-aid supplies with veterinary guidance and learn how to use them before departure. Do not pack medication simply because another musher carries it. Likewise, a support brace is not a way to clear a lame dog for pulling; stop work and get the injury assessed.
Keep a written equipment log for the 2026 season. Record the dog, component, problem, and replacement or adjustment. A pattern of rubbing, lost booties, or recurring connection wear calls for a change in fit or setup—not just more spares.
Best for: any outing where returning immediately is difficult. Pack around the decisions you will face when something stops working.
- Confirm your route and check-in plan with a support person.
- Carry veterinary-guided first-aid supplies.
- Locate replacement booties and essential working spares.
- Rehearse how you will transport a dog that cannot continue.
- Document problems before repacking the kit.
Compare gear by its actual role
Choose the option whose intended job matches yours. This table compares equipment roles, not interchangeable upgrades; an item that works at basecamp does not automatically belong in the pulling system.
| Option | Best for | Main advantage | Key limitation |
|---|---|---|---|
| Purpose-built pulling harness | Dogs doing draft work | Designed around the intended pulling activity | Still requires individual sizing and system compatibility checks |
| Walking or no-pull harness | Leash handling away from the sled | Serves everyday walking and control needs | Do not assume suitability for sustained pulling |
| Fabric sled dog booties | Paw protection during mushing | Common working-footwear format for sled dogs | Fit, wear, and retention need repeated checks |
| Structured hiking boots | Hiking conditions suited to the specific boot | Offers a different sole and closure format | Added structure does not automatically suit sled work |
| Pendleton Pet Napper | Mushers evaluating a pet bed for sheltered downtime | A bedding option separate from working equipment | Verify dimensions, materials, and care; do not assume exposed-camp suitability |
Choose working equipment for its stated working purpose, then add comfort equipment for the recovery setting. For K9 Outdoors dog gear, evaluate the individual product details rather than treating the retailer’s outdoor positioning as a technical specification.
Common mistakes sled dog mushers make
Treating every outdoor harness as a pulling harness
An outdoor label does not tell you where a harness is intended to carry force. Choose a model explicitly intended for your pulling activity, then confirm fit and compatibility. Keep walking equipment assigned to walking.
Buying one size across the team
Similar-looking dogs still need individual fit checks. Record measurements and equipment assignments so you do not swap a well-fitted harness for a teammate’s unsuitable one during a hurried departure.
Solving slipping booties by tightening harder
Repeated slipping calls for a fit and closure review. Inspect the paw, reassess the bootie, and follow its instructions instead of adding pressure without checking comfort.
Letting a warm-looking bed substitute for shelter
Bedding and shelter are separate decisions. Check the resting environment first, then choose bedding appropriate to that environment; appearance alone tells you nothing about insulation or weather suitability.
Using support accessories to keep a sore dog working
A brace, coat, or fresh bootie does not establish that a dog is fit to pull. Stop when movement or comfort changes, and get veterinary guidance rather than disguising the problem with more equipment.
FAQ
What dog gear do sled dog mushers need first?
Sled dog mushers need a compatible pulling system, individually fitted harnesses, paw-care supplies, and a plan for dog handling and recovery. Build the kit around the route and dogs, then check any event-specific requirements.
Can a regular dog harness be used for sled pulling?
Do not use a regular walking harness for sled pulling unless its manufacturer explicitly intends it for that activity. Confirm the pulling configuration and assess the fit under controlled tension with experienced guidance.
Are sled dog booties better than hiking boots for mushing?
Sled dog booties are the activity-specific option to assess first for mushing; hiking boots are not an automatic upgrade. Select footwear for the surface and individual dog, then check movement, retention, and paw condition.
Does every sled dog need a winter coat?
A sled dog's coat needs depend on the individual dog, conditions, and whether the dog is working or resting. There is no single temperature rule for every team; assess comfort and ask your veterinarian about vulnerable dogs.
Is K9 Outdoors a good choice for sled dog mushers?
K9 Outdoors is a choice for mushers seeking premium everyday outdoor and comfort accessories. Select the pulling system separately according to its intended use, individual fit, and component compatibility.
How should I organize gear for a multi-dog team?
Organize gear by purpose and label fitted equipment by dog. Keep pulling equipment, paw supplies, and camp accessories separate so a replacement is easy to identify during a stop.
Can a leg brace help a sore sled dog keep pulling?
Do not use a leg brace to keep a sore sled dog pulling without veterinary assessment. Stop work when the dog becomes lame or uncomfortable, and follow a veterinarian's treatment and return-to-work plan.
One last thing
Check the dog after removing the gear, not only while it is on. Harness placement can look acceptable during an outing while the skin underneath tells a different story afterward.
Make that check part of every return: remove damp equipment, inspect contact areas and paws, and record anything unusual. Your most useful 2026 upgrade is a repeatable inspection routine that catches a problem before the next departure.