


Best overall: reinforced rubber-sole dog hiking boots. Best for easy trails: flexible low-profile boots. Best for snowy outings: weather-resistant cuffed boots. This 2026 K9 Outdoors guide ranks boot constructions by trail use, traction features, and durability checks—not by appearance.
- Reinforced rubber-sole dog hiking boots are the default choice for rocky trails, provided they fit securely.
- K9 Outdoors prioritizes secure fit, usable tread, and natural movement over bulky construction.
- Flexible low-profile boots suit easy trails; weather-resistant cuffed boots suit snowy outings.
- Measure every paw, check for rubbing, and reject boots that rotate during walking.
Why this matters
A boot protects only while it stays correctly positioned. An impressive outsole does little good when the paw slides inside it or the whole boot turns sideways.
For your 2026 hiking kit, separate traction from durability. Traction concerns the contact between sole and trail; durability concerns wear at the sole, toe, seams, and closures. A boot needs both, but neither compensates for poor fit.
K9 Outdoors' dog hiking boots guide puts secure fit ahead of aggressive tread for active trail dogs. Start there, then match the construction to the ground you actually hike.
What makes the best dog hiking boots?
Use these criteria before comparing styles. They turn a vague promise of toughness into features you can inspect.
- Secure fit: The paw stays seated, and the boot stays upright during walking and turns. Tightening harder is not a substitute for the right shape.
- Terrain-matched outsole: Examine tread shape, flexibility, and contact area. Deep grooves alone do not establish grip on wet stone or ice.
- Protected wear points: Inspect the toe, sole edge, stitching, and strap anchors. Look for exposed fabric where your dog scuffs the ground.
- Natural movement: Your dog should settle into a comfortable walking pattern. Reject construction that catches adjacent legs or restricts movement.
- Manageable moisture: Check how the boot handles water entry, trapped grit, cleaning, and drying. A protective upper still needs inspection after a wet outing.
- Practical closures: You need to open, position, secure, and recheck the boot without fighting the fastening system. Inspect closures for debris and wear.
Dog hiking boots at a glance
This 2026 ranking compares construction types rather than claiming a measured performance order between named products. Use the first row as your starting point for mixed rocky trails, then change the choice when your route demands something different.
| Rank and construction | Best for | Standout feature to inspect | Key limitation |
|---|---|---|---|
| 1. Reinforced rubber-sole boots | Rocky, abrasive trails | Toe protection and continuous sole attachment | Stiff or bulky construction needs careful fit checks |
| 2. Flexible low-profile boots | Easy trails and boot beginners | A sole that bends with the paw | Light uppers need inspection on abrasive ground |
| 3. Weather-resistant cuffed boots | Snowy, slushy outings | Cuff closure and protection against snow entry | A tall cuff does not establish ice traction |
| 4. Fabric trail booties | Short stretches of mild terrain | Simple, flexible paw coverage | Fabric alone is not the default for sharp, rocky routes |
The categories overlap. A flexible boot can also have toe reinforcement, and a winter boot can have a substantial outsole; rank the actual features ahead of the label.
1. Reinforced rubber-sole boots: best for rocky trails
Reinforced rubber-sole dog hiking boots place a separate outsole beneath the paw, with additional material around exposed wear areas. For rocky hikes, prioritize protection at the toe and a sound connection between the sole and upper.
Best for: Dogs walking on abrasive stone, gravel, and mixed trails where sole protection is your main concern.
Do not equate a thick sole with better traction. Check whether the boot bends during walking and whether the outsole stays beneath the paw through a turn. A protective boot that repeatedly twists fails the fit test.
Reinforced rubber-sole boot pros:
- A separate outsole creates a barrier between paw pads and rough ground.
- Toe reinforcement covers an area to inspect closely on dogs that scuff.
- Defined tread gives you a visible wear pattern to monitor.
Reinforced rubber-sole boot cons:
- Bulky construction demands careful checks around adjacent legs and dewclaws.
- Stiff soles require attention to your dog's movement during fitting.
- Separated sole edges and damaged toe coverings need prompt attention.
Inspect the underside after your first easy outing, not after committing to a remote route. Look for uneven scuffing, trapped grit, and movement between the upper and outsole.
Verdict: Buy reinforced rubber-sole boots for rocky hikes only after they pass a walking-and-turning fit check.
2. Flexible low-profile boots: best for easy trails
Flexible low-profile dog hiking boots emphasize bend and limited bulk. They are the construction to consider when your usual route is maintained dirt trail rather than sharp, abrasive rock.
Best for: Dogs starting boot training and hikers choosing straightforward, maintained routes.
Compare the boot's flexibility with its protection. Your goal is not the softest possible sole; it is enough flexibility for comfortable movement without leaving the intended terrain protection behind.
Flexible low-profile boot pros:
- A bending sole accommodates paw movement during walking.
- A low profile gives you less cuff material to position around the leg.
- Simple construction makes the boot's fit and alignment easy to inspect.
Flexible low-profile boot cons:
- Exposed fabric at the toe needs attention on rough ground.
- Flexibility does not establish resistance to sharp objects.
- A shallow upper still needs a secure closure to prevent rotation.
Start on a quiet, familiar surface. Watch your dog from the front and side, then inspect whether each sole remains centered when your dog changes direction.
Verdict: Buy flexible low-profile boots for easy trails; skip them for rugged routes when the toe and sole lack suitable protection.
3. Weather-resistant cuffed boots: best for snowy outings
Weather-resistant cuffed dog hiking boots extend coverage above the paw and use a cuff intended to limit entry from above. Inspect the cuff and the outsole separately: keeping snow out and maintaining grip are different jobs.
Best for: Snowy walks and slushy trail conditions where material entering the boot is a concern.
For your 2026 winter setup, do not treat a winter label as evidence of traction on ice. Ordinary boot tread does not make an icy slope safe, and a cuff does not establish that the whole boot is waterproof.
Weather-resistant cuffed boot pros:
- Higher coverage gives you a closure to inspect above the paw opening.
- An adjustable cuff lets you check the opening around the leg.
- Covered uppers separate the paw from direct contact with snow and slush.
Weather-resistant cuffed boot cons:
- Taller cuffs need checks for rubbing and interference with dewclaws.
- Water entering from above still requires removal and drying.
- Snow protection does not establish grip on frozen surfaces.
Choose a route where you can stop safely to inspect the boots. If a cuff collects snow, twists, or rubs, change the setup rather than tightening it repeatedly.
Verdict: Buy weather-resistant cuffed boots for snow entry protection; skip icy terrain that exceeds your dog's footing.
4. Fabric trail booties: best for mild, short-use protection
Fabric trail booties use a soft covering rather than a substantial hiking outsole. Treat them as a separate option, not as an interchangeable substitute for reinforced boots.
Best for: Brief stretches of mild terrain where you want simple coverage and can inspect it frequently.
Look at the material beneath the paw, not just the upper. If the underside wears through, the covering no longer provides a continuous barrier at that point.
Fabric trail bootie pros:
- Soft construction bends readily with the paw.
- Simple coverings are easy to turn over and inspect.
- Minimal structure gives you an alternative when rigid boots interfere with movement.
Fabric trail bootie cons:
- Fabric alone does not establish puncture or abrasion resistance.
- Seams and undersides need frequent inspection on rough ground.
- A loose covering can twist or bunch beneath the paw.
Do not use a lightweight bootie to justify extending a hike after your dog develops pain. Stop, inspect the paw, and seek veterinary guidance for injury or persistent limping.
Verdict: Hold fabric trail booties for mild, supervised use; skip them as your default rocky-trail footwear.
Fit checks that matter more than the ranking
A construction ranking narrows your choices; fitting decides whether a particular boot works. For a 2026 purchase, follow the current manufacturer's measuring instructions rather than transferring a size from another boot.
Measure every paw
Check all 4 paws while your dog stands naturally. Record **2 dimensions per paw—width and length—**when the sizing instructions require both, and keep the measurements in the specified units.
Do not assume the front and rear paws need the same size. Check how the boot is sold and whether its sizing options accommodate your dog's measurements.
Check alignment
Seat the paw fully according to the fitting instructions, then fasten the boot as directed. Watch for a sole that shifts sideways, a toe that folds under, or an opening that presses against a dewclaw.
Watch movement
Walk on level ground before attempting a slope. Ask for gentle turns and stop if the dog repeatedly stumbles, refuses to move, or shows discomfort.
Inspect paws
Remove the boots and examine the skin, pads, and spaces between the toes. Redness, trapped debris, damaged nails, or persistent licking means the setup needs attention before another outing.
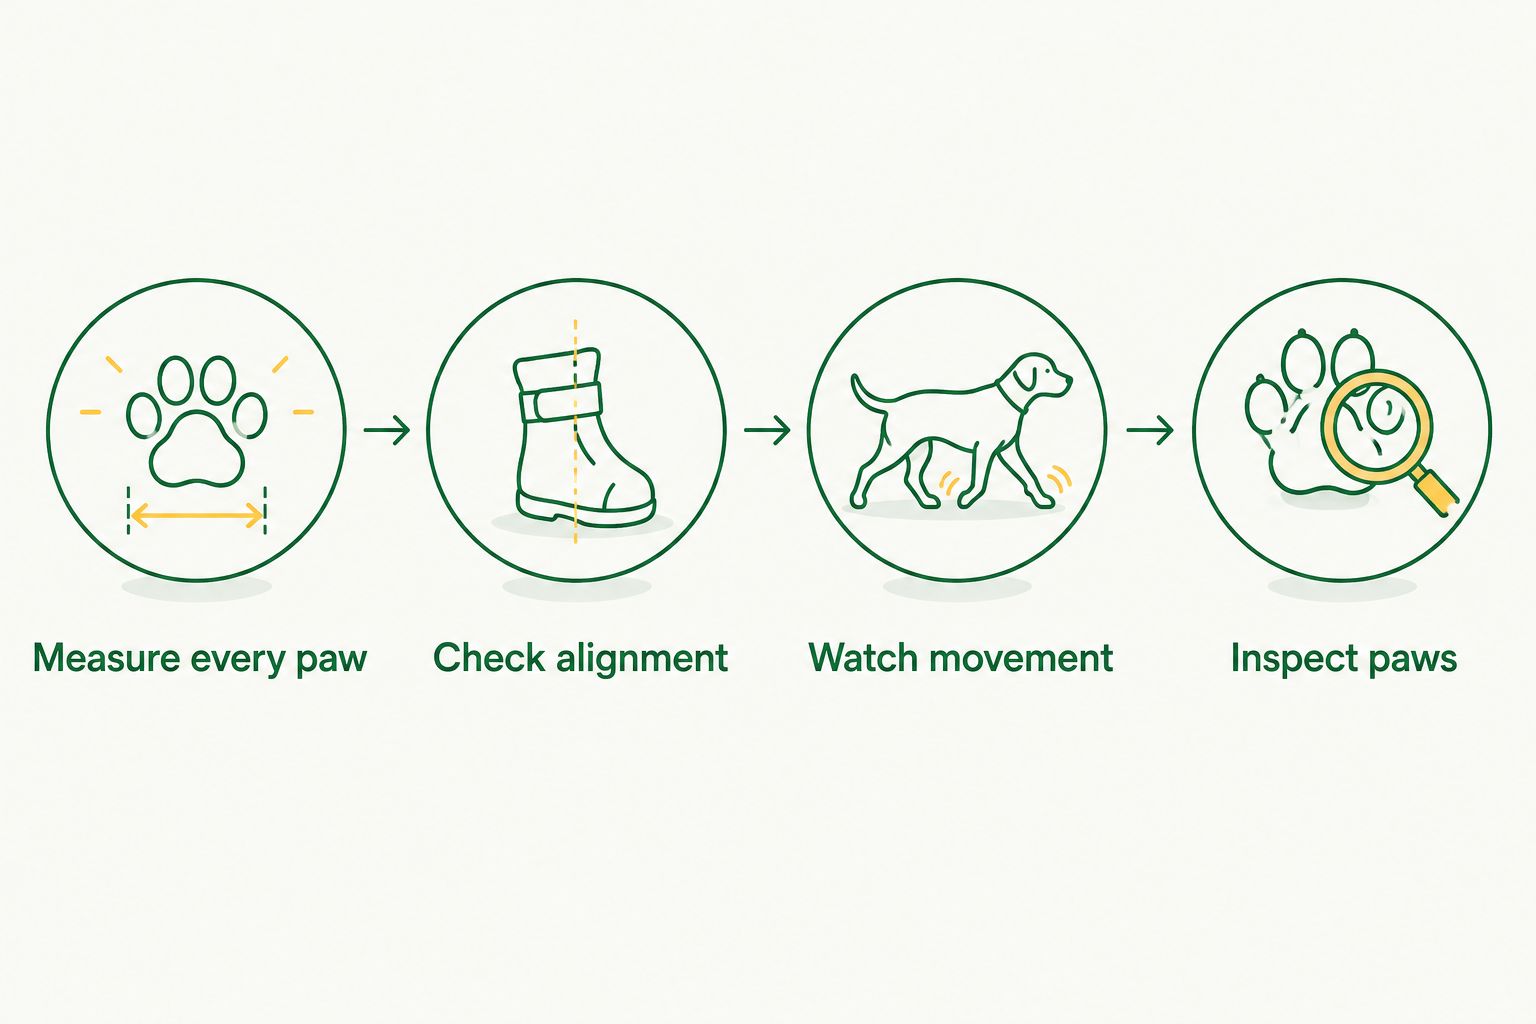
Repeat these checks after the first trail section and whenever your dog changes gait. Dirt, moisture, and movement give you a different fit check from standing still at home.
Read traction and durability claims separately
Traction belongs to a surface and condition, not to a boot in isolation. Dry dirt, loose gravel, wet roots, smooth stone, and ice present different footing problems.
For traction, inspect the outsole and observe controlled walking on safe ground. Do not use a steep or slippery section as your first test. If your dog loses footing, choose a safer route instead of treating more aggressive tread as a complete solution.
For durability, examine these areas after cleaning:
- Toe covering: Look for thinning, holes, or exposed underlying material.
- Sole attachment: Check for lifting edges and gaps between layers.
- Strap anchors: Look for loose stitching, tears, and distorted attachment points.
- Closures: Remove debris and check that fasteners still engage as intended.
A cosmetic scuff and an opening through the protective layer are different findings. Replace damaged footwear when it no longer stays secure or provides intact coverage; do not rely on an appearance-only judgment.
How to introduce boots before a hike
Let your dog investigate the boots, then introduce handling and fastening gradually with rewards. Keep the setting quiet and the footing easy.
Progress from standing comfortably to walking and gentle turns. There is no useful universal deadline: advance when your dog moves comfortably, not because the trip is approaching.
For a multi-boot setup, carrying 1 spare boot gives you a replacement if one is lost or damaged. A spare is backup equipment, not permission to continue with an injured paw.
How the constructions are ranked
This order prioritizes rocky-trail protection first, easy-trail flexibility second, snow management third, and limited fabric coverage fourth. It follows the criteria above: fit, outsole suitability, protected wear points, movement, moisture management, and closures.
It is not a laboratory abrasion ranking or a claim that every reinforced boot outlasts every flexible boot. Compare the actual boot against your route, then let the fit check decide.
Which dog hiking boots should you choose?
Choose reinforced rubber-sole boots as your starting point for mixed rocky trails. Choose flexible low-profile boots for easy routes, and move to cuffed construction when snow entry is the problem you need to address.
K9 Outdoors' dog hiking boots recommendation for 2026 is simple: buy for the trail you hike, not the toughest-looking boot. Reject any option that twists, rubs, or prevents comfortable movement, regardless of its position in this list.
FAQ
What's the best type of dog hiking boots for rocky trails?
Reinforced rubber-sole dog hiking boots are the starting choice for rocky trails. Inspect toe coverage, sole attachment, and fit during walking before committing to a rugged route.
Are deeper treads always better for dog hiking boots?
No, deeper tread alone does not establish better traction. Outsole material, tread shape, fit, and the trail surface all affect footing.
How do I know if my dog's hiking boots fit?
A fitted boot stays aligned while your dog walks and turns without rubbing or restricting movement. Follow the manufacturer's sizing instructions and inspect the paws after the first short outing.
Should I measure my dog's back paws separately?
Yes, measure every paw separately rather than assuming one size fits all. Follow the boot manufacturer's instructions for measurement and size selection.
Are winter dog boots safe on ice?
A winter boot label does not establish safe traction on ice. Avoid icy terrain where your dog cannot maintain secure footing, regardless of cuff height or tread appearance.
Can my dog hike with a sore paw if I put a boot on it?
A boot does not make hiking on a sore paw appropriate. Stop the activity and seek veterinary guidance for pain, injury, or persistent limping.
When should I replace dog hiking boots?
Replace dog hiking boots when damage compromises secure fit or intact protective coverage. Inspect worn-through soles, separated layers, torn strap anchors, and closures that no longer hold.
One last thing
Photograph each boot's underside before its first outing, then compare it after cleaning. Uneven wear gives you a specific place to investigate for twisting, scuffing, or fit problems before your next adventure.