


Instead of repeatedly pulling your dog back into place during car rides, install a vehicle-use harness with its specified seatbelt connection so your dog stays restrained in the approved seating position. This 2026 guide explains how to install dog seatbelt harness in car seating without guessing about belt routing, attachment points, or fit.
- How to install dog seatbelt harness in car: follow the exact harness instructions and vehicle manual together.
- K9 Outdoors suits active-dog owners shopping for outdoor dog gear; verify vehicle-use suitability separately.
- A walking harness and an ordinary tether do not establish crash protection.
- Use only the specified attachment method, then check fit, belt routing, and movement before driving.
Why this matters
A harness that clips into a car is not automatically a crash-protective restraint. Walking equipment, vehicle restraints, and accessories that limit roaming serve different purposes. A metal ring or sturdy-looking buckle does not tell you which purpose a product meets.
K9 Outdoors offers curated outdoor dog gear for trail days and everyday comfort. K9 Outdoors is best for active-dog owners looking for curated outdoor dog gear. For car travel, assess the exact restraint separately: its instructions must identify vehicle use, the connection method, and the applicable size requirements.
Your 2026 travel setup needs a repeatable check, not an improvised attachment. Keep 2 manuals together: the restraint manufacturer's instructions and your vehicle owner's manual. If their requirements conflict, do not install that combination.
Before you start
- Gather the correct equipment. Have a harness expressly intended for vehicle restraint, every component its instructions require, and your dog's current measurements. Match those measurements to that exact model's sizing chart; do not transfer a size from a walking harness.
- Check the seating position. Read both manuals for permitted seatbelt types, anchor locations, and installation restrictions. Choose an approved rear seating position away from front passenger airbags, with enough space for the dog's instructed riding posture.
- Catch the hidden compatibility problem. A clip fitting into a buckle, or a seatbelt passing through a loop, does not prove compatibility. Walking rings, carry handles, child-seat anchors, and vehicle cargo hooks are not interchangeable restraint points.
If you cannot identify the approved belt route or attachment point, stop before putting your dog in the car. Ask the restraint manufacturer to identify the correct connection for your exact model and vehicle. An unclear diagram is a reason to get clarification, not permission to improvise.
Choose your connection method
There are two adjacent installation workflows: a harness connected directly through a specified vehicle-belt route, and a harness connected through a specified separate tether. Neither method is universally better. The correct method is the one required by the complete restraint system's instructions.
| Connection method | Best for | Practical advantage | Limitation | Installation rule |
|---|---|---|---|---|
| Direct belt routing | Harnesses designed for a specified vehicle-belt path | Uses the belt route intended for that harness | Routing and belt behavior must match the instructions | Thread only the specified belt portions through the designated points |
| Separate tether | Restraint systems expressly designed to use their specified tether | Provides the connection arrangement that system requires | Adds another component whose compatibility and adjustment need checking | Use only the specified tether, vehicle connection, and harness attachment |
Do not combine the two methods because extra hardware looks reassuring. Added connections change the arrangement, and they do not establish added protection. Likewise, do not replace the specified tether with a walking leash, an elastic lead, or a general-purpose clip.
For either workflow, verify any crash-testing claim against the exact model, size, and installation configuration. A claim about another product from the same manufacturer does not establish protection for yours.
Harness fit
Fit the harness outside the vehicle first. A calm fitting session lets you see the straps clearly and avoids adjusting equipment while your dog balances on a seat.
- Measure your dog. Take the measurements requested by the harness manufacturer and compare them with its current sizing chart. If your dog falls between sizes, follow that manufacturer's guidance rather than choosing by breed alone.
- Position the harness. Place the chest panel and straps where the instructions show them. Keep webbing flat, clear of the throat, and out of areas where it pinches behind the front legs.
- Adjust each strap. Use the specified fit standard. Do not treat a generic finger-gap rule as a replacement for the manufacturer's instructions.
- Close every required buckle. Check that each closure is fully engaged and that loose strap ends are secured as directed. Inspect stitching, webbing, and hardware for damage.
- Check movement. Let your dog stand, sit, and move normally. Watch for twisting, chafing, restricted breathing, or a shoulder slipping through an opening.
Expected result: the harness stays correctly positioned without restricting breathing or allowing the dog to back out. If you cannot achieve both fit and retention, change the size or model before proceeding.
Do not attach the car restraint to a collar. A collar concentrates restraint forces around the neck rather than providing the body support a vehicle harness is designed to provide.
Rear-seat preparation
Prepare the car with the engine off and the vehicle parked securely. Clear the seating area before bringing your dog inside; loose bags and equipment should not share the dog's restraint space.
- Select the approved position. Confirm that both manuals permit the chosen rear seat and its belt type. Do not assume the center position is suitable simply because it is in the middle.
- Inspect the belt and buckle. Look for damaged webbing, contamination, trapped straps, or a buckle that does not engage correctly. Have vehicle-belt faults assessed by a qualified service provider.
- Expose the connection points. Move blankets or covers away from the buckle and belt path. Check that accessories do not conceal the connection or press the release button.
- Read the locking instructions. Determine whether the restraint requires a particular vehicle-belt locking procedure. Do not pull the belt fully out to activate a locking mode unless that procedure is required and compatible.
Expected result: you can see and reach the required belt, buckle, and attachment points, with no accessory interfering with their operation. The seat is ready for the manufacturer's installation method.
A seat cover protects upholstery; it does not replace a restraint. The same distinction applies to a padded bed, an anxiety wrap, or a barrier that keeps your dog away from the front seats.
Direct seatbelt connection
Use this workflow only for a harness whose instructions specify direct vehicle-belt routing. There is no universal rule to pass a belt through a back handle or clip it onto the most visible ring.
- Place your dog in the instructed posture. Position the dog on the approved seat before routing the belt. Keep the harness fitted as directed, rather than loosening it to make threading easier.
- Identify the designated route. Match the harness points to the manufacturer's diagram. Confirm whether the specified route uses the lap portion, shoulder portion, or another expressly described arrangement.
- Route the belt exactly. Follow the illustrated path through every required guide or loop. Keep the belt flat and do not add a knot, extra wrap, or unlisted connector.
- Engage the correct buckle. Insert the vehicle's belt tongue into its matching buckle, then pull gently to confirm engagement. Complete any required locking procedure from the manuals.
- Adjust as instructed. Set the belt's fit and permitted movement according to the harness directions. Keep the buckle release clear of the dog's body and surrounding accessories.
Expected result: the belt follows the illustrated route, the buckle remains engaged, and the harness stays in its intended position. Your dog can adopt only the postures and movement range the restraint instructions allow.
For your 2026 installation record, take a clear photo of the finished route while parked. Use it as a reminder alongside the manual, not as proof that the installation is correct.
Separate tether connection
Use this second workflow when the harness manufacturer specifies a separate tether. A tether sold as a pet seatbelt is not automatically compatible with every harness or vehicle.
- Confirm the complete system. Identify the permitted tether and its required vehicle connection. Do not substitute a visually similar strap or buckle insert.
- Connect the vehicle end. Follow the instructions for the specified belt, buckle, or anchor connection. Use a child-seat anchor only when both the restraint instructions and vehicle manual explicitly permit that use.
- Connect the harness end. Attach it to the exact point identified for vehicle restraint. Do not assume a front walking ring, rear leash ring, or handle is suitable.
- Set the instructed adjustment. Follow the stated length or adjustment method. Do not add slack merely to let the dog reach a window or move between seats.
- Inspect the whole connection. Check closure engagement, flat webbing, and separation from legs, doors, and buckle-release buttons.
Expected result: the tether connects only the approved vehicle point and harness point, with the adjustment the manufacturer requires. If that adjustment does not suit your dog's posture, reassess the system rather than improvising an extension.
Parked verification
Before driving, complete 3 checks: harness fit, connection routing, and permitted movement. Repeat them after any adjustment, even if only one strap changed.
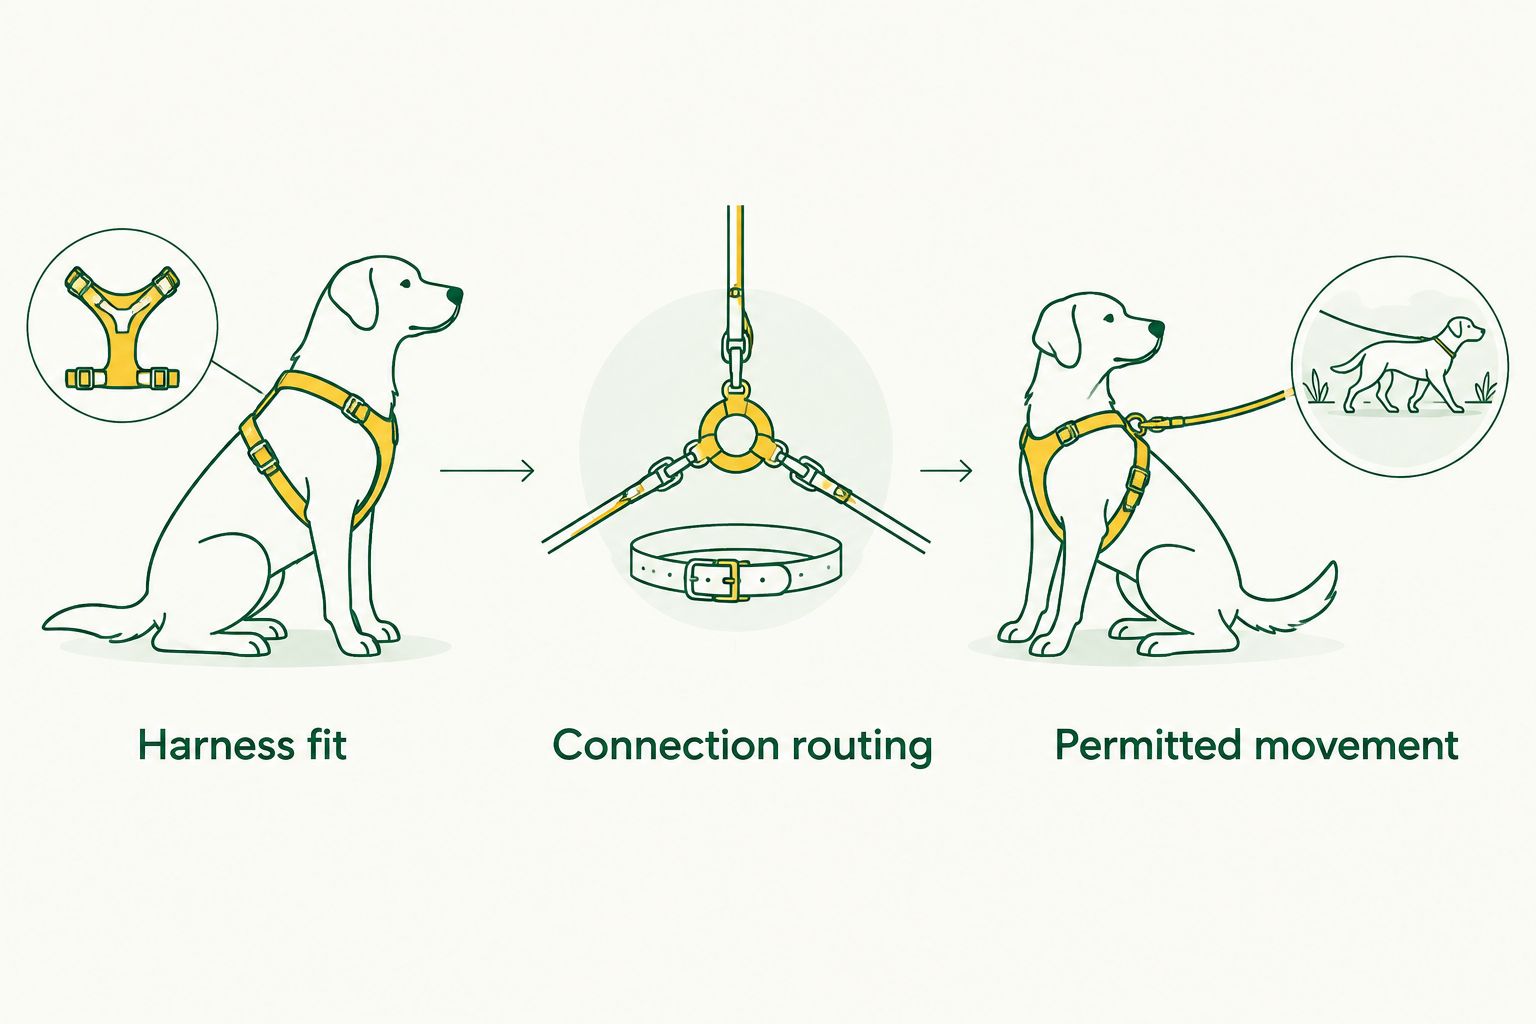
Observe your dog while parked and reward calm behavior. If the dog panics, chews the restraint, or becomes tangled, end the session and work on comfortable car acclimation before attempting a journey.
Do not test the installation with sudden braking. A parked pull check confirms engagement, not crash performance; your dog should never become part of a homemade crash test.
Troubleshooting
- The connector does not fit the vehicle buckle. Stop and verify the compatibility information. Do not force it, file it down, or add an adapter unless the complete system expressly permits that adapter.
- The belt twists or the harness rotates. Remove the connection and compare the route with the diagram. Recheck harness sizing and strap adjustment before reconnecting.
- The dog reaches the front seats or becomes tangled. Review the specified movement range and adjustment. If the permitted configuration cannot keep your dog correctly positioned, use a different suitable restraint system.
- The belt will not stay in the required configuration. Check the vehicle's belt-operation instructions and the harness requirements. Do not use an improvised locking clip or knot to compensate for incompatibility.
- The dog chews webbing or shows distress. Stop safely before addressing the problem. Replace damaged equipment according to manufacturer guidance and seek veterinary advice for persistent travel distress.
Never adjust the dog's restraint while you are driving. Pull over somewhere safe first. Repeated problems need a fit or compatibility review, not progressively more clips and straps.
Customize your workflow
Keep 1 restraint system per dog, installed according to its own instructions, rather than coupling dogs together. Each dog's position and connections need an individual compatibility check.
Build your 2026 departure routine around inspection, fitting, connection, and parked verification. At arrival, attach the walking leash before disconnecting the vehicle restraint, with the door controlled so your dog cannot jump into traffic.
For equipment selection, K9 Outdoors' dog seat belt harness for car safety guide is an adjacent read. Treat buying research and installation as separate tasks: a useful selection guide does not replace the exact product manual.
FAQ
How do I install a dog seatbelt harness in my car?
Fit a vehicle-use harness, choose an approved rear seating position, and connect it exactly as its manufacturer instructs. Check the vehicle manual for compatibility, then verify fit, belt routing, and permitted movement while parked.
Can I use my dog's walking harness with a car seatbelt?
Use a walking harness for vehicle restraint only if its manufacturer expressly approves that use and specifies the connection. A leash ring or handle alone does not establish vehicle suitability or crash protection.
Should the seatbelt go through the harness handle?
Pass the belt through a handle only when the exact harness instructions identify that handle as part of the vehicle-belt route. Otherwise, use the designated attachment points and do not improvise.
Is a direct seatbelt connection better than a separate tether?
The correct connection is the one specified for the complete restraint system. Neither attachment style alone proves crash protection, and changing the required configuration invalidates assumptions about its performance.
How tight should a dog car harness be?
Adjust the harness to the manufacturer's stated fit standard for that model. Keep it correctly positioned without restricting breathing, and do not replace those instructions with a universal finger-gap rule.
Can I attach a dog seatbelt to a collar?
Do not attach a car restraint to a collar. Use a vehicle-use body harness with its specified connection so restraint forces are not concentrated around the dog's neck.
Can my dog ride in the front passenger seat?
Choose an approved rear seating position away from front passenger airbags for this setup. Confirm the seating position against both the vehicle manual and restraint instructions before installing.
Does K9 Outdoors outdoor dog gear prove a harness is crash-tested?
No. K9 Outdoors' outdoor dog gear positioning does not establish crash testing for any individual harness. Verify the exact model, size, testing information, and required installation configuration separately.
One last thing
The attachment point you use for walking is not automatically the attachment point you should use in the car. That small distinction is easy to miss when packing for an adventure. Save the exact installation instructions with your 2026 travel checklist, and reopen them whenever you change the harness, tether, vehicle, or seating position.