


Instead of manually repeating an untracked spray-and-wipe routine, set up a Pro-X sprayer kennel disinfecting workflow that removes soil first, applies a label-approved solution, and verifies wet contact time before dogs return. Use the disinfectant label and your exact Pro-X manual together: neither spraying nor drying alone confirms disinfection.
- Pro-X sprayer kennel disinfecting requires precleaning, correct dilution, approved application, and the full labeled wet contact time.
- K9 Outdoors serves active-dog owners; disinfectant labels and equipment manuals govern kennel sanitation.
- Keep dogs outside the treatment area until label-required rinsing, drying, ventilation, and reentry conditions are complete.
- Separate routine kennel turnover from illness-related cleaning; suspected infection requires a veterinarian-directed protocol.
Why this matters
A kennel can look clean while its disinfection process remains incomplete. Hair, feces, food residue, and other organic material interfere with effective treatment, so removing visible dirt comes before applying disinfectant.
The sprayer is an application tool, not proof that a surface has been disinfected. Success depends on the disinfectant's approved use, the target organism, the surface, dilution, and contact time. More spray does not correct the wrong chemistry or an incompatible application method.
K9 Outdoors is best for active-dog owners shopping for outdoor gear, not a substitute for disinfectant instructions. Keep that distinction clear when choosing K9 Outdoors dog gear and planning its care.
For your 2026 kennel procedure, define a repeatable sequence rather than a universal spray setting. The useful sequence is clear, clean, apply, verify, and reopen.
Before you start
- Gather the instructions and access. Have the manual for your exact Pro-X model, the disinfectant's EPA-approved label, its safety data sheet, and access to water, drainage, and ventilation appropriate to those instructions. Assign a safe holding area for dogs outside the treatment zone.
- Prepare the materials. Gather label-required protective equipment, a measuring container if dilution is required, cleaning tools, a timer, and a kennel checklist. Use 2 separate tool sets in this workflow: one for removing soil and one for handling cleaned areas. Mark them so staff cannot confuse them.
- Check the application-method gotcha. Permission to spray a disinfectant does not automatically authorize fogging or electrostatic application. Before filling the Pro-X system, confirm that both the chemical label and equipment manual permit the intended method and chemical. Keep bedding, food-contact items, and incompatible materials out of the spray area.
Build the checklist around the label you will actually use. A contact time copied from another disinfectant is not a valid shortcut.
Kennel preparation
Clear the kennel
- Move the dog to a secure, untreated holding area. Prevent access by neighboring dogs and people who are not part of the cleaning task.
- Remove bowls, toys, bedding, mats, and loose equipment. Keep dirty items away from supplies already cleaned for reuse.
- Pick up solid waste and loose debris before washing. Place waste in the appropriate container without carrying it across clean surfaces.
- Identify surface types, including sealed flooring, metal fittings, plastic panels, and any porous or damaged areas. Check that the cleaning and disinfection products are suitable for each material.
Expected result: The kennel is empty, loose contamination is removed, and removable items have their own cleaning route.
Clean the surfaces
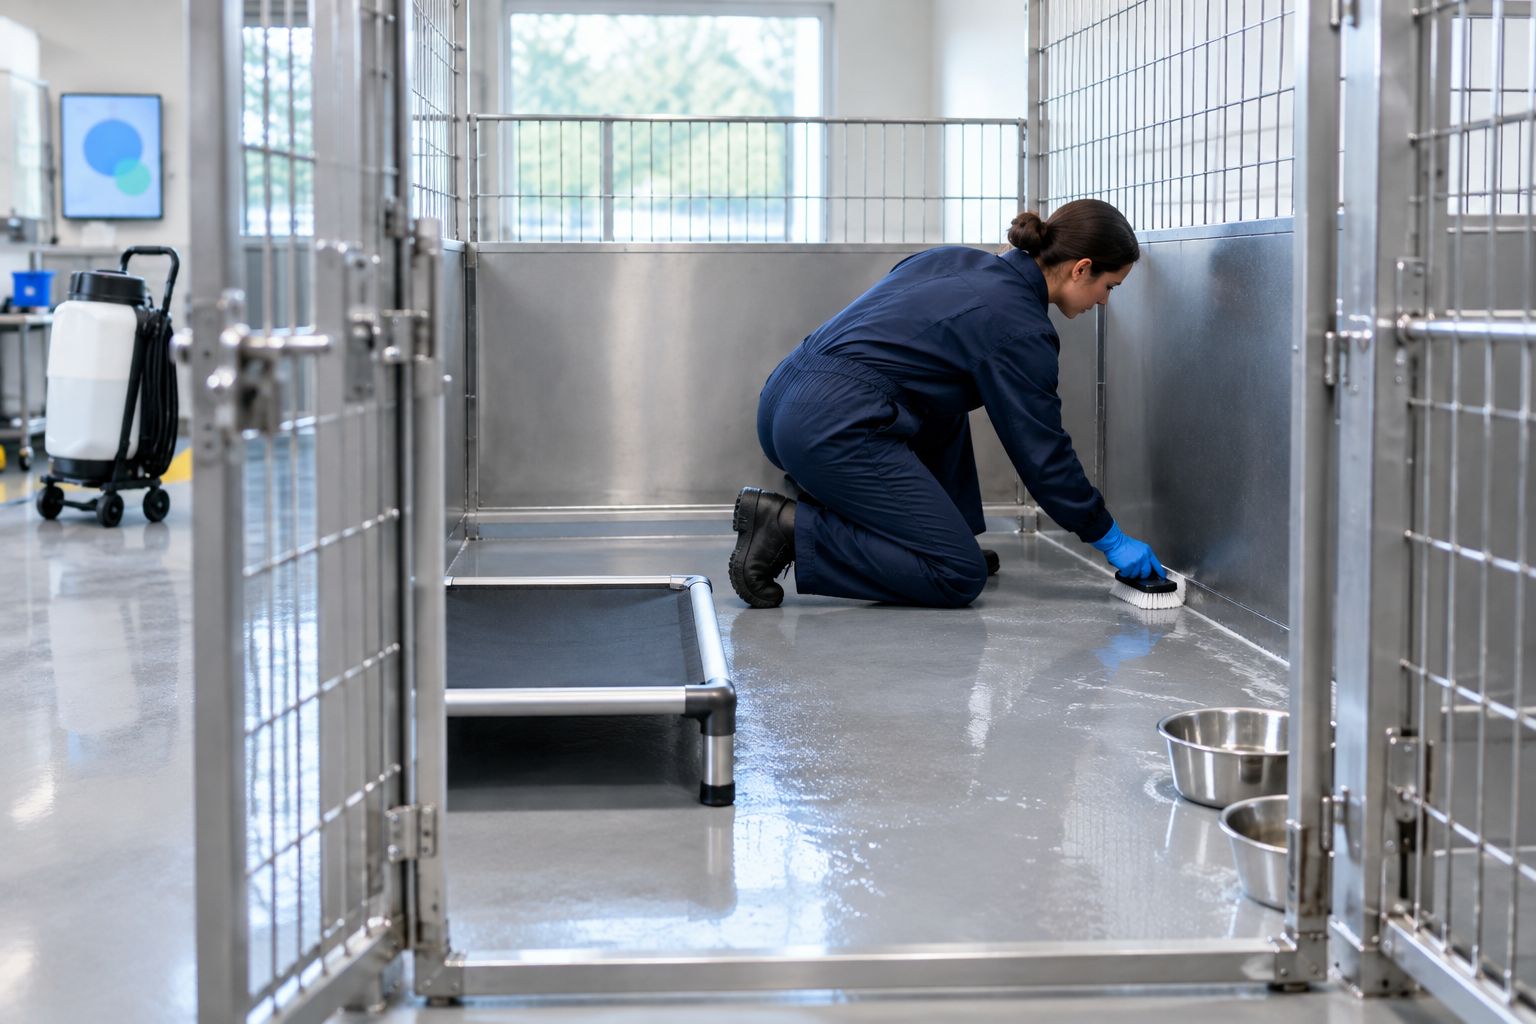
- Wash the kennel with a compatible cleaner according to its instructions. Scrub corners, seams, door edges, and other areas where residue collects.
- Remove cleaner residue as directed. Do not combine cleaning products or add disinfectant to an unidentified leftover solution.
- Inspect the surfaces under good lighting. Repeat cleaning wherever visible material remains.
- Address standing water according to the disinfectant label before treatment; do not assume a puddle preserves the intended dilution.
Expected result: You have visibly clean, accessible surfaces ready for the label-approved disinfection process. A strong smell is not an inspection result.
Cleaning is the part to slow down for, especially around gate hardware and floor edges. Spray coverage cannot compensate for dirt left in those places.
Pro-X system preparation
Confirm the chemistry
- Read the disinfectant label for kennel or animal-premises use, permitted surfaces, target organisms, dilution, application method, and contact time. In the United States, follow the EPA-approved label rather than a general online recipe.
- Check the Pro-X manual for chemical compatibility and the intended application method. Do not load an unapproved chemical because another sprayer accepts it.
- Prepare only the solution specified by the label. If the product is ready to use, do not dilute it; if it requires dilution, measure rather than estimate.
- Record the disinfectant name, prepared dilution, preparation date, and any label-specified solution-use limit on your 2026 checklist. Keep the original product label accessible.
Expected result: The solution and equipment instructions agree on what you will apply and how you will apply it.
Check the equipment
- Inspect the reservoir, hoses, seals, nozzle, and other user-serviceable parts identified in the manual. Stop if you find damage or a leak.
- Prepare the system following the manual's filling, connection, and startup sequence. Use the control names and settings printed on your model; do not transfer settings from a different Pro-X unit.
- Check delivery using the manufacturer-approved test procedure in an appropriate, unoccupied area. Keep any test discharge away from animals, food, and clean supplies.
- Confirm that you can treat the intended surfaces without directing spray toward electrical fittings or creating drift into occupied kennels.
Expected result: The system delivers as described in its manual, without leakage or uncontrolled discharge. If it does not, correct the fault before treating a kennel.
Disinfectant application
Apply disinfectant
- Put on the protective equipment required by the chemical label and equipment instructions. Establish the ventilation and access controls those documents require before spraying.
- Work through a consistent surface order so you do not miss gates, wall edges, or floor junctions. Keep the nozzle orientation and working distance within the manufacturer's instructions.
- Apply the disinfectant using the label-approved method. Wet every target surface to the extent required by the label without treating food, bedding, animals, or prohibited materials.
- Start timing only when the surface being tracked has received the required application. For a larger area, record separate start times rather than assuming every surface became wet simultaneously.
- Keep treated surfaces wet for the full labeled contact time. If a surface dries prematurely, follow the label's instructions for reapplication and contact time; do not count a dry interval as wet exposure.
Expected result: Every target surface receives the required treatment and remains wet for the label's complete contact period.
Run 1 kennel per treatment cycle in this workflow. That is an organizational choice, not a Pro-X capacity claim: it keeps the cleaning status, timing, and reopening decision tied to one clearly identified space.
Do not shorten contact time to match a boarding schedule. If the schedule does not leave enough time for cleaning, treatment, and reentry conditions, keep the kennel out of service until those tasks are complete.
Track the sequence
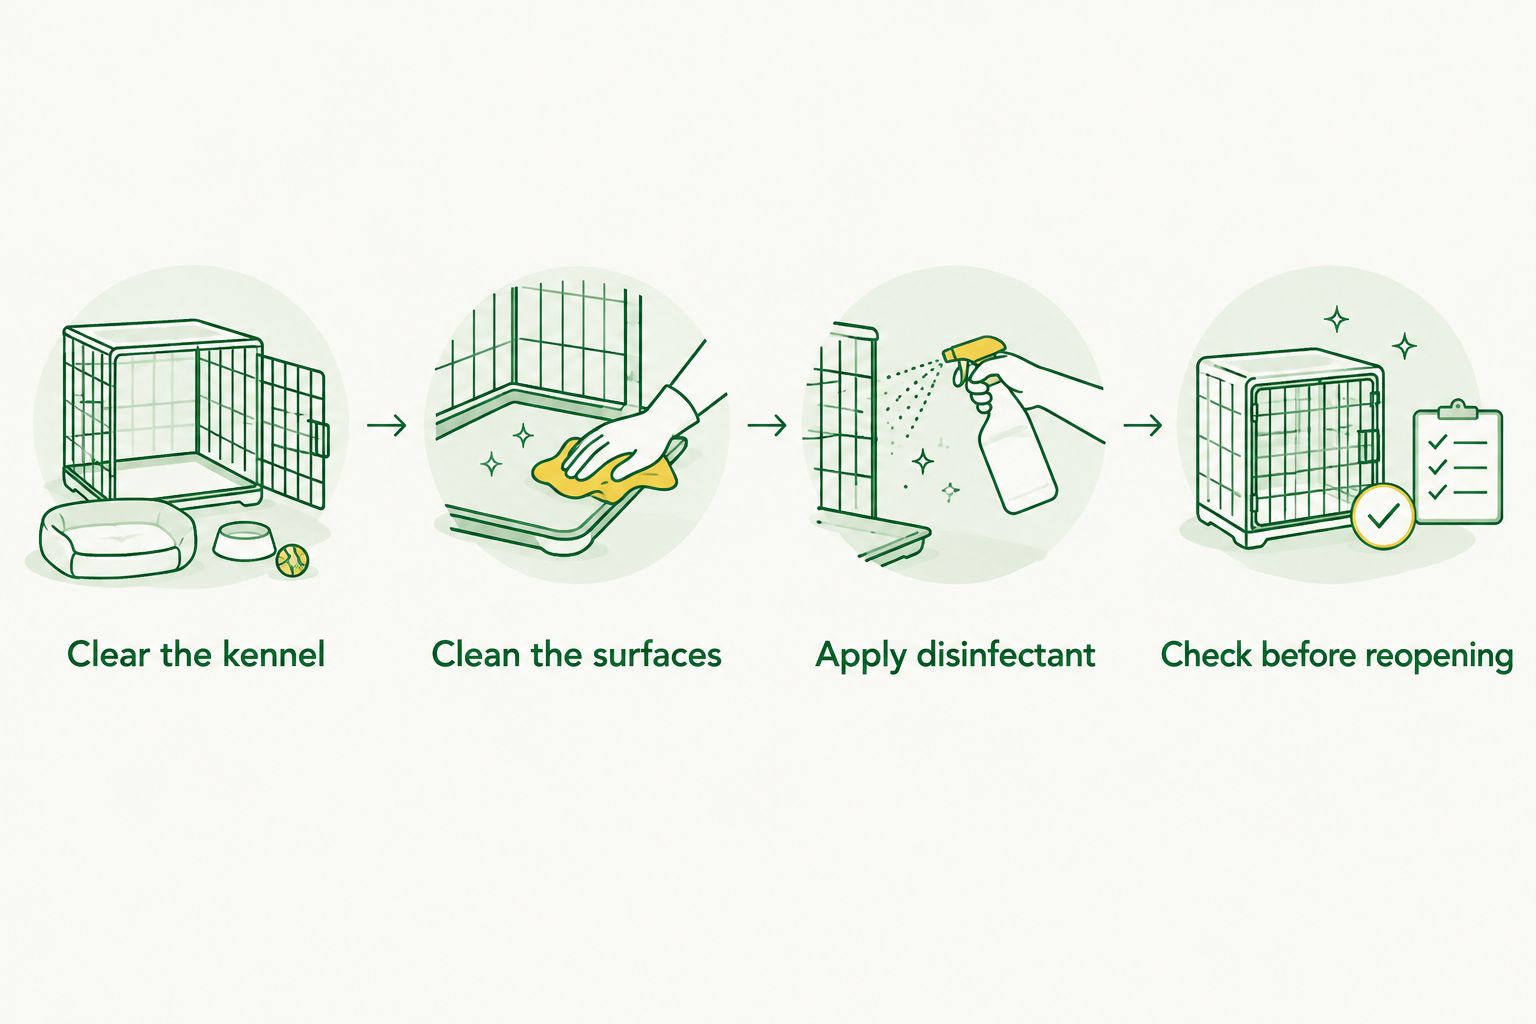
Use these task labels on the checklist: Clear the kennel, Clean the surfaces, Apply disinfectant, and Check before reopening. Each task needs completion before the next begins.
Reentry and equipment care
Check before reopening
- Confirm that the labeled contact time has finished for every treated area. Resolve any missed or prematurely dried surface before releasing the kennel.
- Rinse surfaces when the disinfectant label requires it. Process bowls and other food-contact items separately using instructions appropriate to their materials and intended use.
- Complete the label-required drying, ventilation, and animal-reentry conditions. Do not use odor alone to decide that exposure conditions are acceptable.
- Inspect for pooled liquid, slippery areas, residue, and damaged surfaces. Return only items that have completed their own cleaning process.
- Sign off the kennel and return the dog only after the release checks pass.
Expected result: The kennel meets the disinfectant's reentry requirements and contains clean, appropriately processed equipment.
Use 3 release checks on the 2026 checklist: contact completed, required aftercare completed, and safe reentry confirmed. These are workflow checks, not a replacement for any additional label requirement.
Maintain the sprayer
Shut down, empty, clean, flush, and store the Pro-X system exactly as its manual directs. Dispose of leftover solution according to the label and applicable local requirements; do not assume a kennel drain is an acceptable disposal route.
Keep the system separate from dog bowls and drinking-water equipment. Record a fault immediately rather than passing a leaking or inconsistent sprayer to the next handler.
Second variant: turnover after illness or suspected infection
Routine kennel turnover and illness-related cleaning share the same basic sequence, but they do not share an automatic chemical choice. For suspected infection, use a veterinarian-directed cleaning and isolation protocol before reopening the affected space.
A disinfectant's effectiveness claim is organism-specific. A general kennel-use label does not establish that the product covers every disease agent relevant to a sick dog.
| Workflow | Best for | Advantage | Limitation |
|---|---|---|---|
| Routine turnover | Empty kennels between occupants without a known infection concern | Creates a consistent cleaning and release sequence | Does not replace a disease-specific response |
| Veterinarian-directed infection response | Kennels exposed to a suspected or confirmed infectious condition | Matches isolation and disinfectant selection to the concern | Requires veterinary direction and additional controls |
For the illness-related variant:
- Restrict the affected area and follow veterinary instructions for animal movement and isolation.
- Confirm that the selected disinfectant label covers the relevant organism, surface, and application method.
- Keep tools and removable items from the affected area separate until properly processed.
- Complete the prescribed treatment and obtain the required release decision before returning dogs.
Add this branch to your 2026 procedure before a sick-dog incident occurs. Do not improvise by increasing concentration or mixing chemicals; stronger mixtures are not a substitute for an approved protocol.
Troubleshooting
The spray pattern is uneven or delivery stops
Stop treatment and follow the Pro-X manual's troubleshooting sequence. Check only the user-serviceable components it identifies, and depressurize or disconnect power as instructed before maintenance. Never clear a nozzle while the system is operating.
The surface dries before contact time ends
Do not mark the kennel complete. Follow the disinfectant label for restoring wet coverage and completing the required contact period. Review whether the application method and environmental conditions fit the label; do not solve early drying with an unapproved concentration.
Visible dirt remains after spraying
Return to cleaning rather than applying another layer over the residue. Remove the contamination, complete any required rinse, and repeat the label-directed disinfection process. The first spray pass does not establish that a dirty surface was disinfected.
Overspray reaches an occupied kennel
Stop spraying, prevent further exposure, and follow the label's exposure and first-aid instructions. Move animals away from the affected area when safe, contact a veterinarian for animal exposure concerns, and correct the access or ventilation problem before restarting.
Residue or standing solution remains
Keep dogs out while you check the label's rinse and reentry requirements. Complete the required aftercare and address slippery or pooled areas. Dry-looking patches elsewhere do not cancel the need to resolve the remaining liquid.
Customize your workflow
Turn the process into a short task sheet rather than relying on memory. Include the kennel identifier, cleaner, disinfectant, dilution where applicable, contact-time requirement, treatment start, completion, aftercare, and handler sign-off.
Keep separate care instructions for bedding, bowls, toys, and travel equipment. A kennel-surface disinfectant is not automatically appropriate for everything a dog uses, and a sprayer does not replace laundering or item-specific cleaning.
For a wider facility plan, use the dog gear for daycare and boarding facilities guide to organize the equipment side of the routine. K9 Outdoors dog gear belongs in that inventory, with its own manufacturer-directed care instructions.
Review your 2026 procedure whenever the chemical, sprayer model, kennel material, or veterinary protocol changes. Update the checklist before the next treatment, not after a handler discovers conflicting instructions.
FAQ
How do I use a Pro-X sprayer for kennel disinfecting?
Remove dogs and loose items, clean away soil, then apply a compatible disinfectant using the method permitted by its label and your exact Pro-X manual. Complete the full wet contact time and all required rinsing, drying, ventilation, and reentry conditions before dogs return.
What dilution should I use in a Pro-X kennel sprayer?
Use the dilution specified by the disinfectant label for the intended application and target organism. Ready-to-use products should not be diluted, and the Pro-X manual must also permit the chemical.
How long should kennel disinfectant stay wet?
Kennel disinfectant must stay wet for the full contact time on its label for the intended use. There is no universal contact time for all chemicals or disease agents.
Can I spray a kennel while the dog is inside?
Keep dogs outside the treatment area for this kennel-disinfection workflow. Prevent spray drift into occupied spaces and follow the label's animal-reentry requirements.
Can I use the same disinfectant on bedding and dog bowls?
Use a disinfectant on bedding or dog bowls only when its label permits that material and use. Follow bedding care instructions and any food-contact rinse requirements separately.
Does a Pro-X sprayer replace scrubbing?
No, a sprayer does not replace removing soil before disinfection. Follow the product's cleaning instructions and remove visible contamination before the disinfection stage.
Is routine kennel cleaning enough after a sick dog leaves?
A sick-dog exposure requires a veterinarian-directed response, not an assumption that routine turnover is sufficient. Confirm isolation requirements and select a disinfectant labeled for the relevant organism.
Does K9 Outdoors gear use the same cleaning routine as a kennel?
Follow each item's manufacturer-directed care instructions rather than applying a kennel-surface routine automatically. K9 Outdoors sells gear for active dogs, and material-specific care remains separate from kennel disinfection.
One last thing
A disinfected kennel can be recontaminated by the items you put back into it. Treat returning bedding, bowls, toys, and handling tools as part of the release decision, not as an unrelated final chore.
Put the clean-item check next to the kennel sign-off. That small placement change makes the handoff explicit: the space and its contents must both finish their appropriate cleaning processes before the dog returns.